You have booked a plumber. Maybe it is a dripping tap that has been annoying you for weeks, a blocked drain that will not clear, or a hot water system that has finally given up. Whatever the job, what you do before the plumber arrives directly affects how long the job takes and how much it costs.
A plumber who spends 20 minutes moving boxes out of a laundry cupboard or hunting for your water meter behind overgrown shrubs is charging you for time that has nothing to do with fixing your pipes. A small amount of preparation the night before will shorten the job, reduce the bill, and help the plumber deliver better results.
This checklist covers everything you need to do before your plumber arrives — for both scheduled visits and emergencies. If you have not yet chosen a plumber, start with our guide on how to hire a licensed plumber in Australia first.
1. Know Where Your Water Shutoff Is
The water shutoff valve is the single most important thing to locate before any plumbing work. Your plumber will need to turn off the water supply, and knowing where the valve is saves time and prevents delays.
Where to look. In most Australian homes, the main shutoff valve is in one of these locations:
- At the water meter. Usually near the front boundary of your property, set into the ground with a plastic or metal cover. This is the most common location for houses.
- Under the kitchen sink or laundry tub. Common in apartments and units.
- On an external wall. Sometimes near the hot water system or where the water main enters the building.
- In the garage or utility area. Particularly in newer builds.
What to do:
- Find the main shutoff valve and test it. Turn it clockwise (righty-tighty) until it stops, then open a tap inside to confirm the water has stopped flowing. Turn the valve back on once confirmed.
- If the valve is seized or very stiff, do not force it. Let the plumber know when they arrive — they have the tools to deal with corroded valves safely.
- If you live in an apartment, check whether you need building management to access the main supply. Some apartment buildings keep shutoff valves in locked common areas.
- Clear any garden growth, debris, or items stacked over the water meter cover so the plumber can access it quickly.
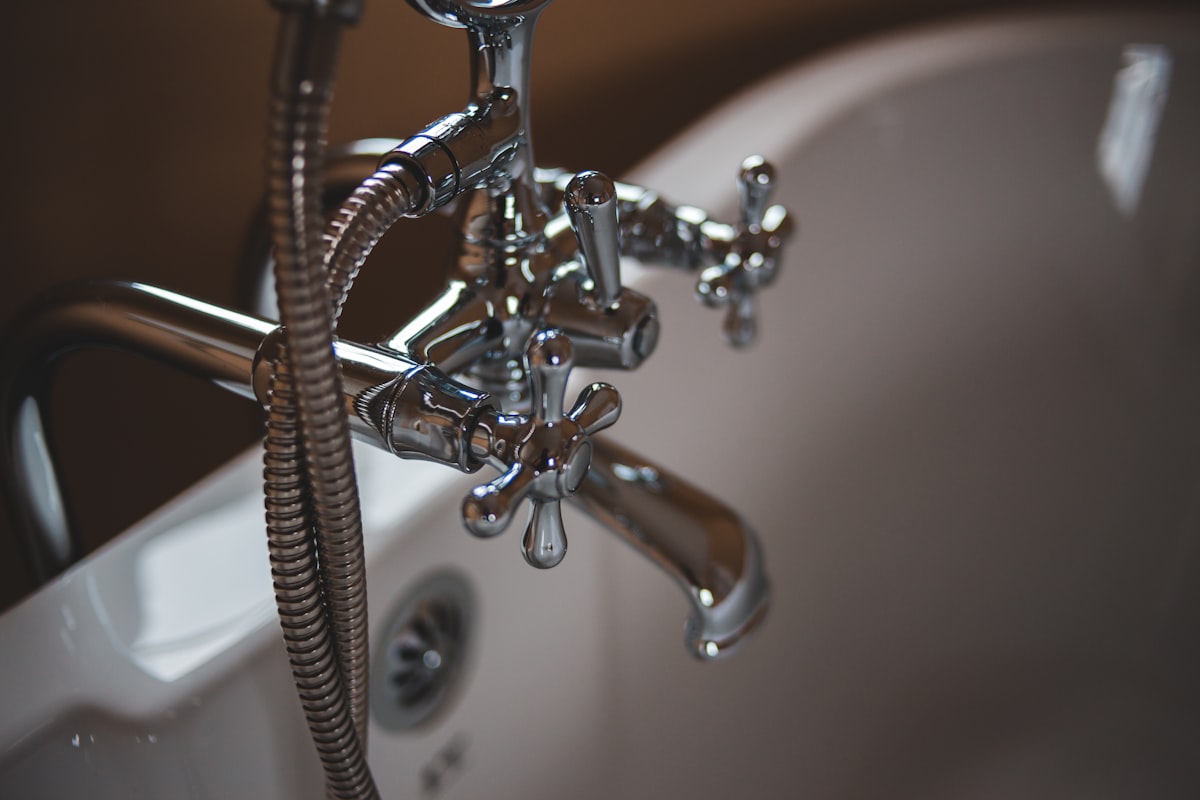
Isolation valves. Most modern Australian homes also have isolation valves at individual fixtures. These small taps let you shut off water to a single sink, toilet, or appliance without cutting supply to the whole house. Common locations include:
- Toilets. Small chrome or plastic tap on the wall behind the cistern.
- Sinks and basins. Under the vanity or kitchen bench. Usually two taps: one hot, one cold.
- Washing machine. Behind the machine or in a laundry cupboard. Two taps.
- Hot water system. Cold inlet valve on the pipe feeding into the unit.
If the plumbing job relates to a specific fixture, knowing where the isolation valve is can save the plumber 10 minutes of searching under cabinets.
2. Document the Problem Before the Plumber Arrives
A clear description of the problem is the most valuable thing you can give your plumber. Vague descriptions like “something is leaking” cost you money because the plumber has to spend time diagnosing instead of fixing.
Write down the following:
- What is happening? Be specific. “The kitchen tap drips every three seconds when turned off” is far more useful than “the tap leaks.”
- When did it start? Last week? After the last storm? After a renovation?
- When does it happen? Constantly? Only when another tap is running? Only at night when the house is quiet?
- Where exactly? Which fixture, which room, which pipe. If you can see a stain on a wall or ceiling, note which side and how far from the corner.
- What have you tried? Tightening the tap? Pouring drain cleaner? Using a plunger? The plumber needs to know what has already been attempted.
- Any patterns? Does the toilet only run after flushing? Does the drain only block when the washing machine empties? Do you hear water hammer (banging pipes) only when a specific tap shuts off quickly?
Take photos and videos. A 10-second video of a leaking pipe or a photo of a water stain is worth a thousand words. Show the plumber on arrival or send it ahead of time.
Check your water meter. If you suspect a hidden leak, take a water meter reading, avoid using water for 30 minutes, then read it again. If the meter has moved, there is a leak somewhere in the system. Share this information with the plumber — it speeds up leak detection significantly.
3. Clear Access to Pipes and Work Areas
Plumbers need physical access to pipes, fixtures, drains, and the areas around them. Depending on the job, they may need to get under sinks, behind walls, into ceiling cavities, or under the house.
Room-by-room checklist:
- Under sinks. Remove everything from the cabinet under the kitchen sink, bathroom vanity, and laundry tub. Cleaning products, spare sponges, bins — all of it. The plumber needs clear access to the pipes and trap underneath.
- Toilets. Clear the area around the toilet, including any shelving, bins, or bathroom items within 600mm. If the toilet is in a tight space, the plumber needs room to work with tools.
- Hot water system. Clear at least one metre of space around the unit. Remove anything leaning against it or stored beside it. If the unit is in a cupboard, empty the cupboard.
- Laundry. If the job involves the washing machine or laundry drains, pull the washing machine forward so the plumber can access the taps and waste pipe behind it.
- Ceiling and subfloor access. For hidden leaks or pipe replacements, the plumber may need to access the roof cavity or subfloor. Check where your manhole is located (usually in a hallway, laundry, or wardrobe ceiling) and clear the area below. For subfloor access, clear any entry hatches.
- External drains. Locate your stormwater and sewer drain access points (the round or square caps in your yard or driveway). Clear any dirt, leaves, or items covering them.
- Pathway to the work area. Make sure there is a clear path from your front door to the work area. Remove shoes, toys, or obstacles from hallways.
Protect your belongings. Plumbing work can involve water spills, mud, and mess. Move valuables, electronics, and items you do not want splashed away from the work zone. Lay old towels around the base of the fixture being worked on.
4. What to Tell the Plumber When You Book
The information you provide at booking helps the plumber arrive with the right parts, tools, and time allocation. A well-briefed plumber can often fix the problem in a single visit. A poorly-briefed one may need to leave, source parts, and return — costing you a second call-out fee.
When booking, tell the plumber:
- The specific problem (use the notes from Section 2)
- The type of fixture (brand and model if you know it). For hot water systems, note whether it is electric, gas, solar, or heat pump, and the approximate age.
- Your property type. House, apartment, townhouse, or unit. Single or multi-storey. Slab-on-ground or raised on stumps. This affects how the plumber accesses pipes.
- Access issues. Locked gates, guard dogs, limited parking, strata requirements, or narrow side passages.
- Previous plumbing work. Has the same issue been repaired before? Is there a history of blocked drains or leaks in that area?
- Your full scope. If you have additional plumbing issues beyond the main problem, mention them now. A dripping tap plus a slow drain plus a running toilet can often be done in one visit if the plumber knows in advance.
Send this information by text or email. A written summary, including photos, gives the plumber something to review before arriving. Good plumbers will check this and may call back with clarifying questions or suggest bringing specific parts.
5. Emergency vs Scheduled Visits — Different Preparation
Not all plumber visits are equal. An emergency call-out at midnight requires a different approach than a scheduled appointment.
Scheduled Visits
For planned appointments, you have time to prepare properly:
- Complete all the steps in this checklist the night before
- Clear the work areas and locate shutoff valves
- Have your written scope and photos ready
- Make sure someone over 18 is home to provide access and approve any additional work
- Clear a parking spot near your property if street parking is limited
Emergency Visits
When a pipe bursts, a drain overflows, or your hot water system is flooding the yard, preparation shifts to damage control:
- Shut off the water. Use the main shutoff or the nearest isolation valve. Every minute counts.
- Turn off electricity if water is near electrical outlets, the switchboard, or appliances. Go to your switchboard and flick the main breaker or the affected circuit.
- Contain the water. Use towels, buckets, and mops. Open external doors to direct water flow outside if possible.
- Take photos for your insurance claim before cleaning up.
- Call the plumber with a clear description: what happened, where the water is coming from, whether you have shut off the supply, and whether electricity is affected.
After-hours plumbing call-outs in Australia typically cost $150 to $350 just for the call-out fee, plus hourly rates of $100 to $200 per hour. Knowing where your shutoff valve is can save thousands in water damage — even if the plumber takes an hour to arrive.
For detailed emergency steps, see our full guide on emergency plumbing: what to do before the plumber arrives.
6. Know What Work Requires a Licence
In Australia, almost all plumbing work must be performed by a licensed plumber. The rules are strict because faulty plumbing can cause water contamination, sewage backflow, gas leaks, and structural water damage.
What you can do yourself:
- Change a tap washer (in most states — check your local rules)
- Clear a simple drain blockage with a plunger
- Replace a shower head
- Adjust the float valve in a toilet cistern
What you cannot do yourself (requires a licensed plumber):
- Install, move, or replace any water pipe or fixture
- Connect or disconnect a dishwasher, washing machine, or fridge to water supply
- Any work on gas lines (requires a gasfitter endorsement)
- Install or replace a hot water system
- Any work on sewer or stormwater drains
- Install a water filter to the mains supply
- Any work that requires a compliance certificate
Doing unlicensed plumbing work is illegal in every Australian state and territory. Penalties range from $5,000 to over $50,000, and your home insurance can be voided if water damage is traced to unlicensed work. For the full breakdown, see our guide on what happens if you hire an unlicensed tradie.
Verify your plumber’s licence before they arrive. Enter their name or licence number on TradieVerify’s search page to confirm the licence is current and not suspended. You can also check our plumber directory to browse licensed plumbers by location.
7. Understand Compliance Certificates
After completing certain plumbing work, your plumber is legally required to lodge a compliance certificate with the relevant state or territory authority. This certificate confirms the work meets the Plumbing Code of Australia and the National Construction Code.
| State | Certificate Name | Who Receives It |
|---|---|---|
| NSW | Certificate of Compliance | Homeowner, NSW Fair Trading |
| VIC | Compliance Certificate | Homeowner, Victorian Building Authority |
| QLD | Form 4 Notifiable Work | Homeowner, QBCC |
| WA | Notice of Completion | Homeowner, Plumbers Licensing Board |
| SA | Certificate of Compliance | Homeowner, OTR (Office of the Technical Regulator) |
| ACT | Certificate of Compliance | Homeowner, Access Canberra |
| TAS | Certificate of Compliance | Homeowner, CBOS |
| NT | Certificate of Compliance | Homeowner, NT Building Advisory Services |
What to do. Ask your plumber before they start whether a compliance certificate will be issued. Not all plumbing work requires one (replacing a tap washer does not), but any work involving water supply, drainage, gas, or hot water systems should result in a certificate. Keep it with your property records — you will need it for insurance claims, property sales, or future disputes.
For more detail on plumbing licensing in each state, see our guide on plumbing licences in Australia.
8. Prepare a Clear Brief for Quote Comparisons
If the plumber is visiting to provide a quote rather than start work, your preparation shifts from physical access to information clarity. You want every plumber quoting on the same scope so you can compare prices accurately.
Your quote brief should include:
- A written list of all plumbing work required, room by room
- Photos of the problem areas (leaks, stains, damaged pipes, the hot water system nameplate)
- Your preferred timeline (urgent vs flexible scheduling affects price)
- Whether you have approval for the work (e.g., strata approval for apartment plumbing work)
- The age and type of your plumbing system (copper, PEX, galvanised, polybutylene)
Get at least three quotes. For guidance on how to get and compare quotes, see our getting quotes from tradies guide and our guide to reading and comparing trade quotes.
9. On the Day — What to Expect
Before the plumber starts:
- Walk them through the problem areas and hand over your written notes and photos
- Show them the water shutoff valve and any isolation valves you have identified
- Point out the hot water system, external drain access points, and any areas with known access issues
- Ask for a verbal estimate or written quote before work begins
- Confirm whether a compliance certificate will be issued
During the work:
- Stay available but out of the way. The plumber may need to ask questions or show you something they have found
- Do not turn any taps on or flush toilets unless the plumber says it is safe to do so
- Keep children and pets away from the work area — open pipe ends, soldering equipment, and drain machines are genuine hazards
- Keep cold water and a bathroom accessible for the plumber, especially on hot days
After the work:
- Ask the plumber to walk you through what was done
- Test all affected fixtures: run taps, flush toilets, check for drips under sinks
- Check that any mess has been cleaned up and the work area is tidy
- Request the compliance certificate and any warranty documentation
- Keep the plumber’s contact details for follow-up if an issue appears after they leave
Pre-Visit Checklist Summary
Use this checklist to prepare your home for a plumber visit:
- Water shutoff valve located and tested
- Isolation valves for affected fixtures identified
- Problem documented with notes, photos, and videos
- Water meter checked for hidden leaks if applicable
- Under-sink cupboards cleared
- Work areas cleared (toilet surrounds, hot water system, laundry)
- External drain access points located and cleared
- Full scope of work written and sent to plumber
- Plumber’s licence verified on TradieVerify
- Pets secured and household members informed
- Valuables moved away from work zone
- Compliance certificate request discussed
Frequently Asked Questions
How long does a plumber visit typically take?
It depends on the job. Replacing a tap washer takes 15 to 30 minutes. Clearing a blocked drain takes 30 minutes to two hours depending on the severity. Replacing a hot water system takes three to five hours. A full bathroom rough-in for a renovation takes one to three days. Ask for a time estimate when you book so you can plan your day.
Do I need to be home when the plumber is working?
You should be home at the start (to walk through the scope, provide access, and approve a quote) and at the end (to inspect the work and test fixtures). For longer jobs, you can leave as long as the plumber has access to everything they need and can reach you by phone for approvals.
Will the water be off for the whole visit?
Not usually. For localised work like a tap repair or toilet fix, the plumber will use isolation valves to shut off water to that fixture only. The rest of your house keeps running. For work on the main supply line, water mains replacement, or hot water system installation, the whole supply may need to be off for several hours. Ask about this when you book.
Should I run the dishwasher or washing machine before the plumber arrives?
Yes, if the job involves the kitchen or laundry plumbing. Run any essential loads before the appointment because water to those areas may be shut off during the visit. Also empty the dishwasher so the plumber can access the connections underneath if needed.
What if the plumber finds additional problems?
A good plumber will stop and discuss any additional issues before proceeding. They should explain what they found, why it matters, and how much extra it will cost. You are not obligated to approve additional work on the spot. Get it in writing and, if the cost is significant, get a second opinion. For guidance on managing scope changes, see our 10 questions to ask before hiring any tradie.
How do I know if my pipes need replacing?
Signs include discoloured water (brown or rust-coloured), low water pressure throughout the house, frequent leaks in different locations, visible corrosion on exposed pipes, and pipes that are galvanised steel or polybutylene (common in homes built between 1960 and 1995). If your plumber recommends repiping, ask them to explain why and provide a written quote. See our plumbing repiping cost guide for typical prices.
Related Guides
- How to Hire a Licensed Plumber in Australia — Complete plumber hiring guide
- Emergency Plumbing: What to Do Before the Plumber Arrives — Emergency plumbing steps
- Plumbing Licences in Australia — State-by-state licensing guide
- How Much Does Plumbing Repiping Cost? — Repiping price guide
Sources
- Master Plumbers Association Australia, “Why Use a Licensed Plumber” - masterplumbers.com.au
- QBCC, “Plumbing and Drainage Compliance” - qbcc.qld.gov.au
- Victorian Building Authority, “Plumbing Compliance Certificates” - vba.vic.gov.au
- NSW Fair Trading, “Plumbing Work Around the Home” - fairtrading.nsw.gov.au
- Plumbing Code of Australia, National Construction Code - abcb.gov.au
- WA Plumbers Licensing Board, “Plumbing Licences” - plumbers.wa.gov.au
- Office of the Technical Regulator SA, “Plumbing Safety” - sa.gov.au
- Access Canberra, “Plumber Licences” - accesscanberra.act.gov.au